
|
Using the Simulator - Getting Started |
Press the F1 key to get on line help.
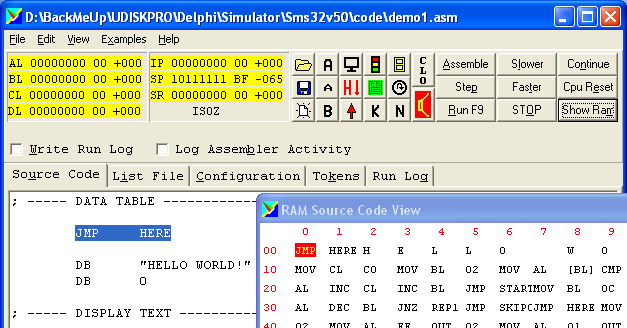
To write and run a program using the simulator, select the source code editor tab by pressing Alt+U.
Type in your program. It is best to get small parts of the program working rather than typing it all in at once.
Here is a simple example. Also look at the tutorial example programs. You can type this into the simulator or copy and paste it. The assembly code has been annotated with comments that explain the code. These comments are ignored by the assembler program. Comments begin with a semicolon and continue to the end of the line.
; ===== COUNT ================================================= MOV AL,0 ; Move 0 into the AL register REP: ; This label is used with jump commands ADD AL,2 ; Add two to AL JMP REP ; Jump back to the rep label END ; Program ends here ; ============================================================= |
| To run a program, you can step through it one line at a time by pressing Alt+P or by clicking this button repeatedly. | |
| You can run a program continuously by pressing F9 or Alt+R or by pressing this button | |
| To speed up or slow down a running program use these buttons or type Alt+L or Alt+T | |
| To stop a running program press Alt+O or click or press Escape or press this button. | |
| To restart a paused program, continuing from where it left off, press Alt+N or click this button. | |
| To restart a program from the beginning, reset the CPU by pressing Alt+E or click this button. | |
| To re-open the RAM display window, press Alt+M or click this button. |
| The code you type is called assembly code. This human-readable code is translated into machine code by the Assembler. The machine code (binary) is understood by the CPU. To assemble a program, press Alt+A or click this button. | |
| You can see an animation of the assembler process by checking this box. | |
| When you run or setp a program, if necessary, the code is assembled. |
There is short delay while the assembbler goes through all the stages of assembling the program. The steps are
The machine code stored in RAM can be viewed in three modes by selecting the appropriate radio button.
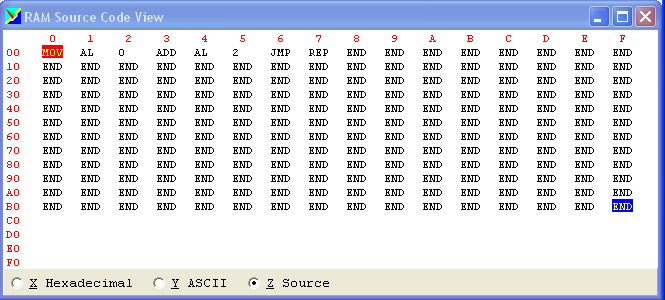
Hexadecimal - This display corresponds exactly to the binary executed by the CPU.
ASCII - This display is convenient if your program is processing text. The text is readable but the machine codes are not.
Source Code - This display shows how the assembly code commands are placed in memory.
The tutorial examples provide a step by step introduction to the commands and techniques of low level programming. Each program has one or more learning tasks associated with it. Some of the tasks are simple. Some are real brain teasers.
© C Neil Bauers 2003